How to Create Your First Calendar on WordPress with EventBlender
How to Create Your First Calendar on WordPress with EventBlender
Put a month of events on a WordPress post in about ten minutes. First you type a few events into the EventBlender block and choose one of the calendars that come with it. Then you design a calendar of your own in the online Calendar & Timeline Wizard, bring it to your site and publish it. Last, you see where else the events can come from.
The plan
A calendar in five clicks
The EventBlender block takes your events and a ready-made calendar design, a ruleset, and puts the calendar in the post.
Your own design
The Calendar & Timeline Wizard on tabulizer.com builds a ruleset in your colours and with the options you choose. Download it as a data source and import it.
Your own events
A data source can read the events from a file, a spreadsheet, a database, a Google Calendar and more.
Everything below was made on WordPress with the block editor. Tabulizer 7 and later include every EventBlender feature, so with Tabulizer, read Tabulizer wherever this page says EventBlender. Using Joomla? Follow the Joomla version of this tutorial instead.
Part 1, step 1: add the EventBlender block
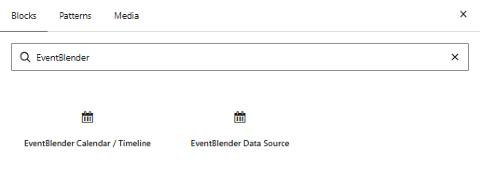
Create a new post or page (Posts › Add New), give it a title and a line of introduction. Press the + block inserter, search for EventBlender and choose EventBlender Calendar / Timeline.
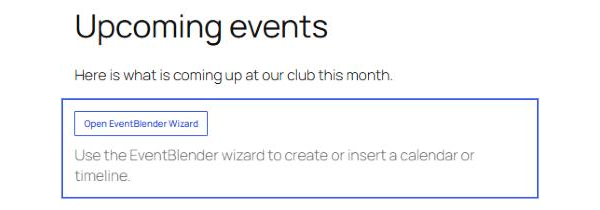
The block appears in the post. Press Open EventBlender Wizard.
Step 2: choose New Static Display
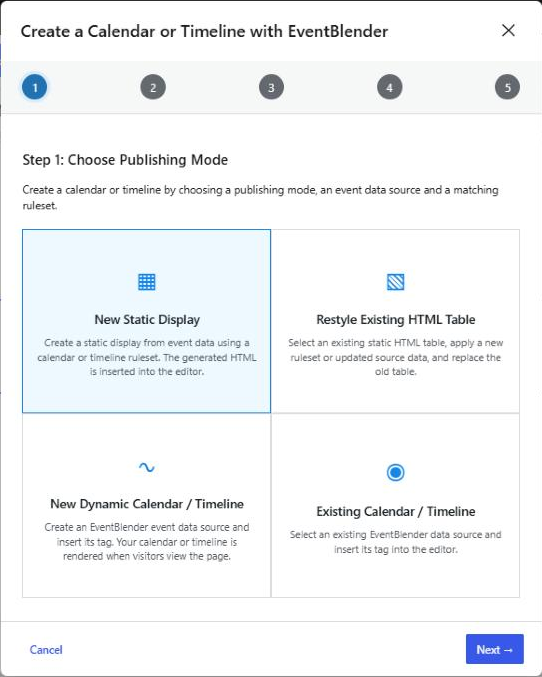
The wizard opens at Step 1: Choose Publishing Mode. Choose New Static Display and press Next. A static display keeps the events in the post itself, so it needs no data source on your site.
Step 3: type your events
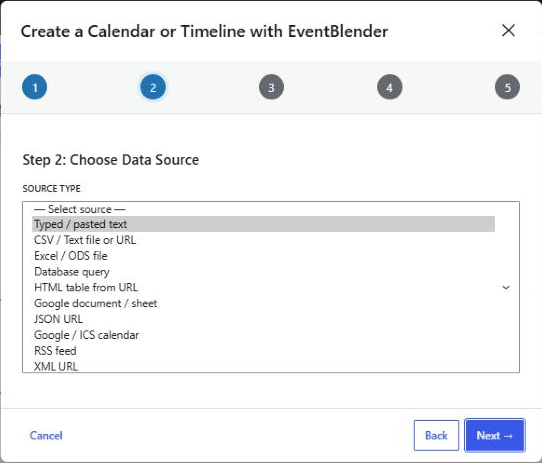
In Step 2: Choose Data Source, set Source Type to Typed / pasted text and press Next.
In Step 3: Configure Source, paste your events into Delimited Data, one per line, with a first line naming the columns. Leave Separator at Comma and Enclosure at Double quotes.
date,title,start_time,end_time,category,location,description
2026-11-04,Beginners' workshop,18:00,20:00,Workshops,Room A,An introduction for new members
2026-11-07,Autumn concert,19:30,22:00,Concerts,Main hall,Our choir with guest musicians
2026-11-12,Members' meeting,17:00,18:30,Meetings,Room B,Plans for next year
2026-11-14,Photography walk,10:00,13:00,Outdoors,Old harbour,Bring a camera or a phone
2026-11-18,Beginners' workshop,18:00,20:00,Workshops,Room A,Part two
2026-11-21,Charity bake sale,09:00,14:00,Outdoors,Town square,Proceeds go to the local shelter
2026-11-26,Film night,20:00,22:30,Concerts,Main hall,A classic comedy with popcorn
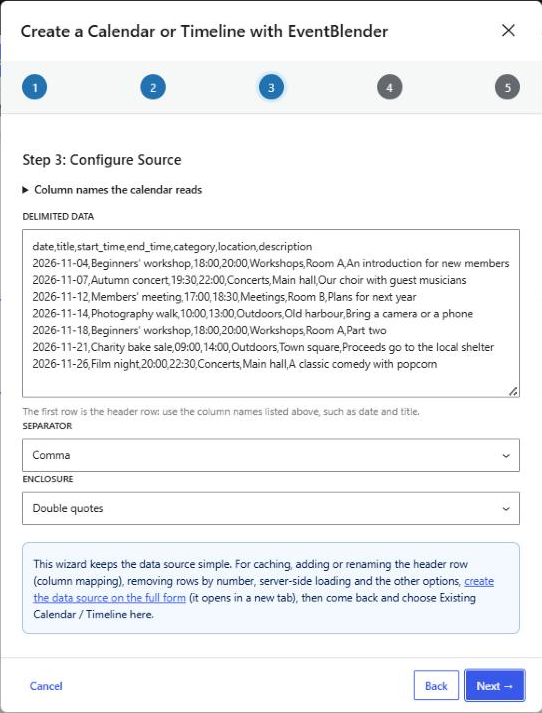
The calendar finds each piece of an event by its column name, so the order of the columns does not matter. Open Column names the calendar reads at the top of the step for the full list; the ones you will use most are:
| Column | What it holds |
|---|---|
date (required) |
The day of the event, as YYYY-MM-DD. |
title (required) |
The name shown on the calendar. |
start_time, end_time |
Times as HH:MM. Leave them out for an all-day event. |
end_date |
The last day of an event that runs over several days. |
category |
Events of one category share a colour, and visitors can filter by category. |
location, description, url |
Shown when a visitor opens the event. |
repeat, repeat_until |
For an event that comes back daily, weekly, fortnightly, monthly or yearly, and the last day it does. |
"Room A, first floor".Step 4: choose a calendar
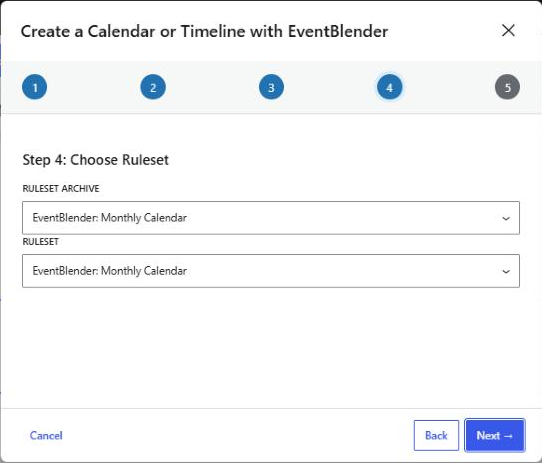
In Step 4: Choose Ruleset, choose EventBlender: Monthly Calendar as both the Ruleset Archive and the Ruleset and press Next. Any of the other eleven works with the same events, so try a timeline or the agenda list later.
Step 5: insert it
Step 5: Confirm sums up your choices. Press Insert, then Publish the post.
The result
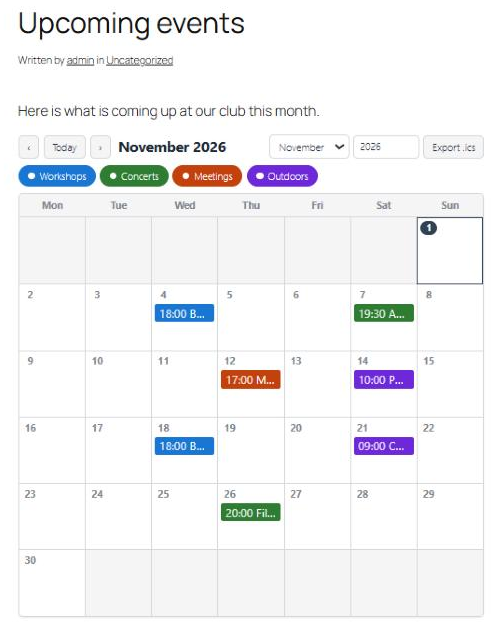
Open the post on your site. The calendar opens on the month of the first upcoming event, with a button per category, arrows and a month and year jump to move around, and Export .ics to copy the events into a visitor's own calendar.
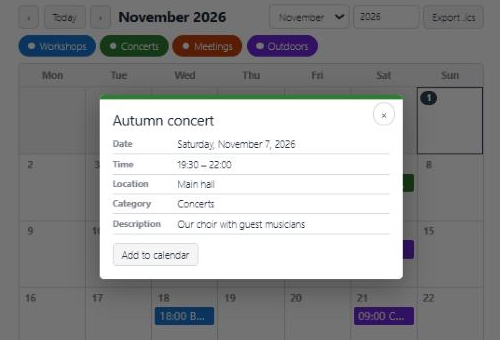
Click an event to see all of it:
A static display is a snapshot: the events are stored in the post. To change them, select the block, press Open EventBlender Wizard and go through the steps again. When the events change often, or when you want a design of your own, go on to part 2.
Part 2, step 1: choose a layout online
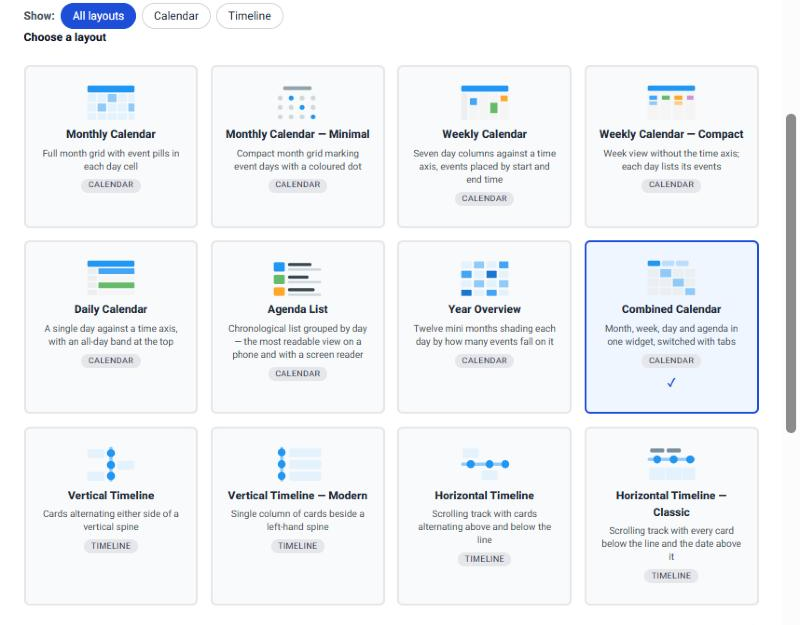
Log in to tabulizer.com and open Wizards › Calendars & Timelines Wizard. In step 1 (Layout), pick a layout - the example uses Combined Calendar, which lets visitors switch between month, week, day and agenda - and press Next step.
Step 2: make it yours
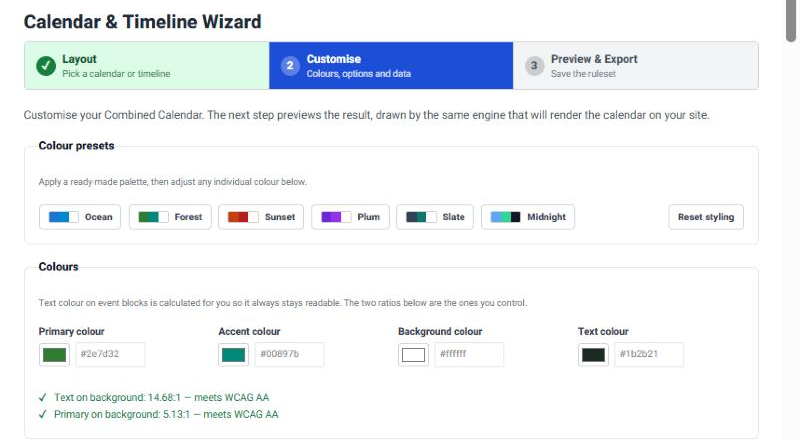
Step 2 (Customise) holds every option of the layout. Start with a Colour preset - the example uses Forest - and adjust single colours if you like; the wizard checks that text stays readable. Further down you set the heading above the calendar (here Club events), the first day of the week, the time format, whether to show category filters, a search box and the calendar export.
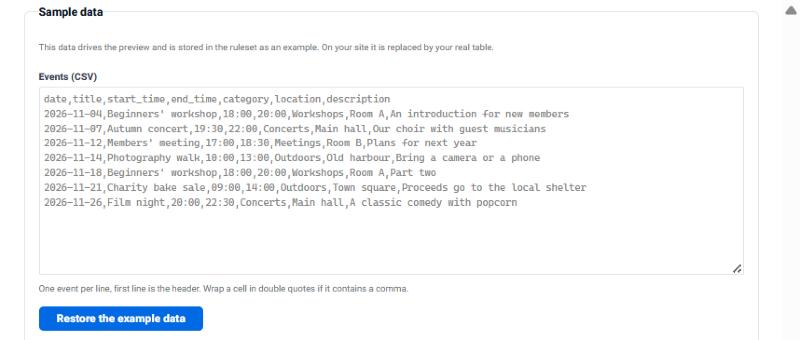
At the end of the step, Sample data holds the events the preview shows. Paste the same CSV as in part 1; it travels with the ruleset as your first set of events.
Step 3: preview and save
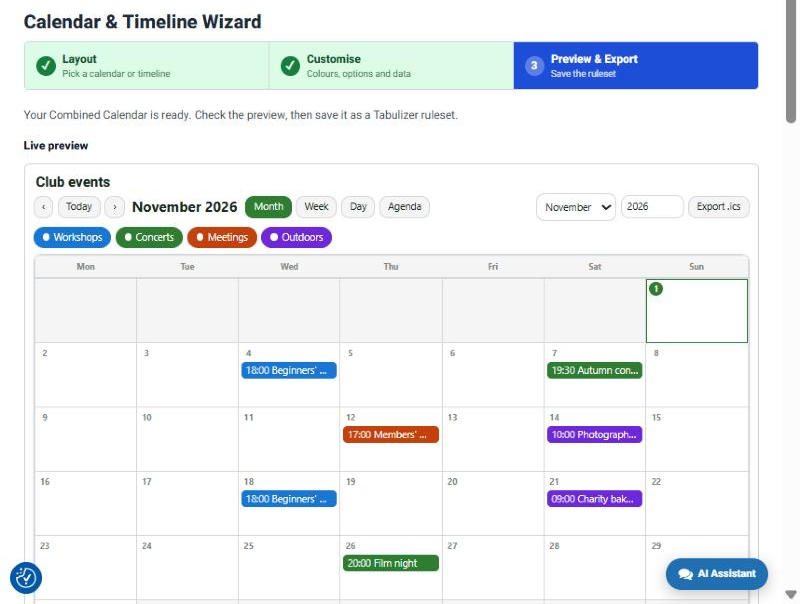
Step 3 (Preview & Export) shows the calendar exactly as it will look on your site. Try the views and the category buttons.
Below the preview, give the ruleset a title and a description and press Save & download ruleset.
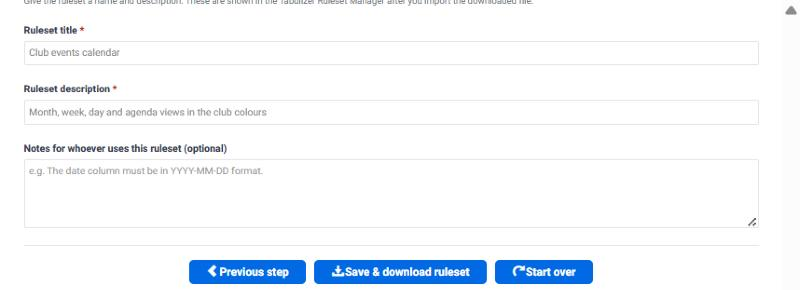
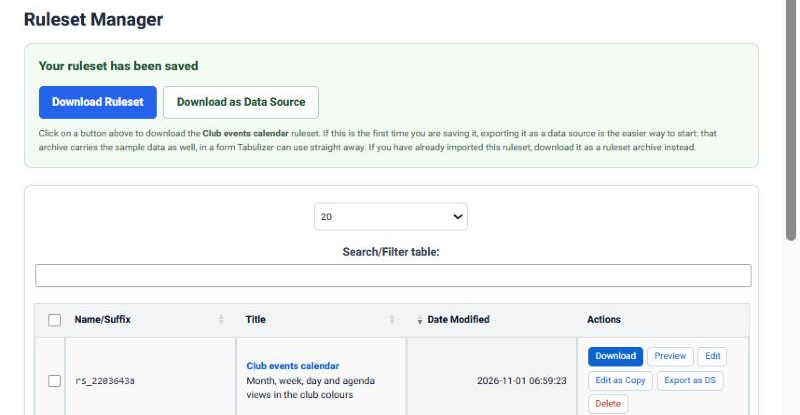
You land in the Ruleset Manager. This first time, press Download as Data Source: you get one zip with the ruleset, its styles, your events as a CSV file and a data source that ties them together. The same zip works on WordPress and on Joomla.
Step 4: import it into WordPress
In your WordPress dashboard go to EventBlender › Ruleset Archives, press Import Archive and choose the zip.
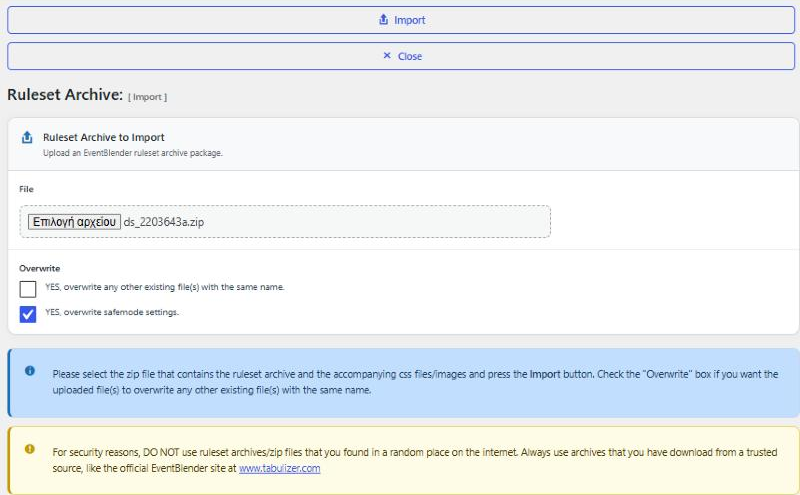
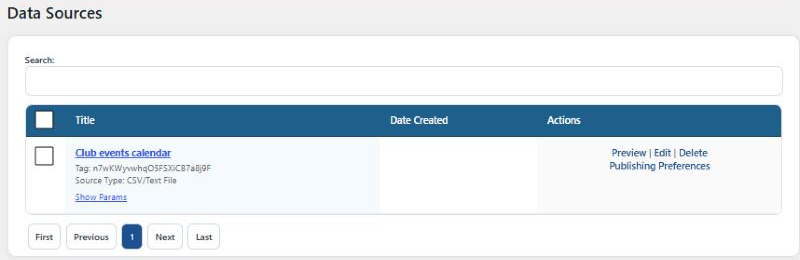
Press Import. Under EventBlender › Data Sources you find a new data source named after the ruleset:
Step 5: put it in a post
Create another post, add an EventBlender Calendar / Timeline block and press Open EventBlender Wizard.
Choose the mode
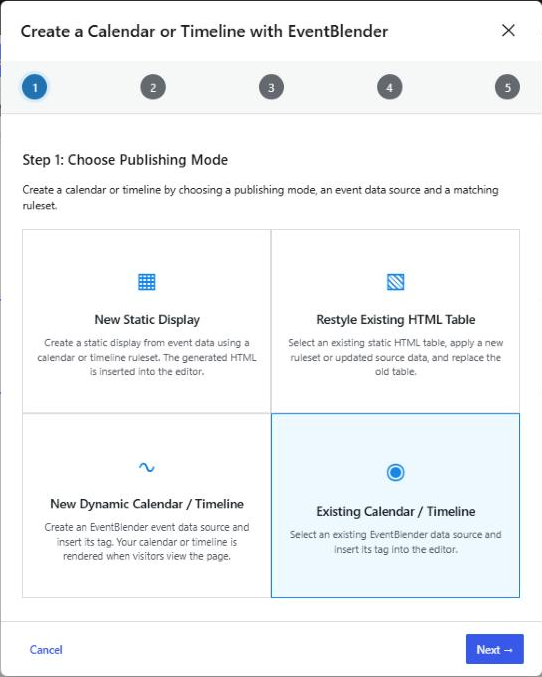
Choose Existing Calendar / Timeline and press Next.
Pick the data source
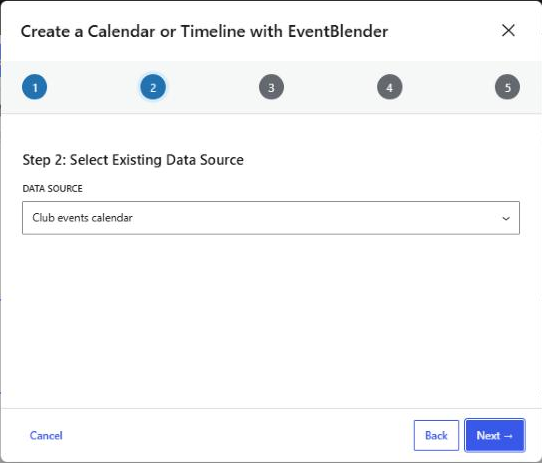
Select Club events calendar in the Data Source list and press Next. Steps 3 and 4 only confirm that the data source keeps its own settings and ruleset, so press Next through them.
Insert it
Press Insert in step 5.
This time the block holds only a short tag. The tag is replaced with the calendar every time the page is shown, so the calendar always shows the current events.
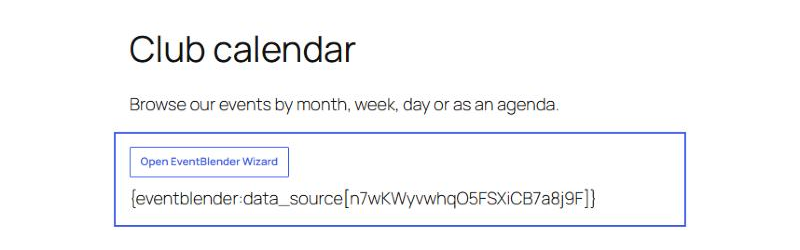
[data-source tag="n7wKWyvwhqO5FSXiCB7a8j9F"] in the classic editor or a text widget, using the tag shown on the Data Sources page.Publish the post and open it on your site.
The result
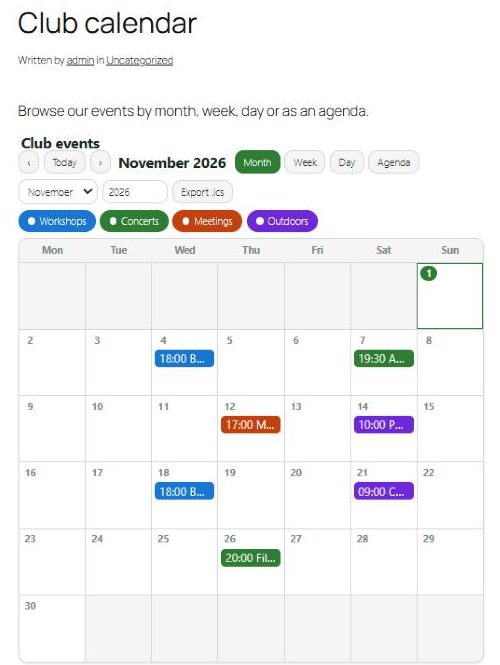
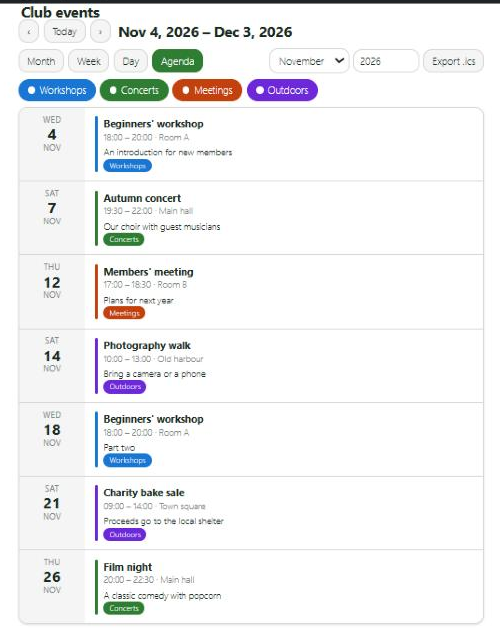
Visitors switch views with one click. The agenda lists every event with its time, place and description:
To change the events, change the data source's CSV file: open the data source and use Edit data file, or upload a new version with Manage Data Files on the Data Sources page. To change the design, edit the ruleset on tabulizer.com, download it with Download Ruleset and import it with Overwrite ticked.
Part 3: where else the events can come from
A CSV file is only the start. The calendar shows any data that has a date and a title column, whatever the source. Go to EventBlender › Data Sources, press New Data Source and look at the Source Type list:
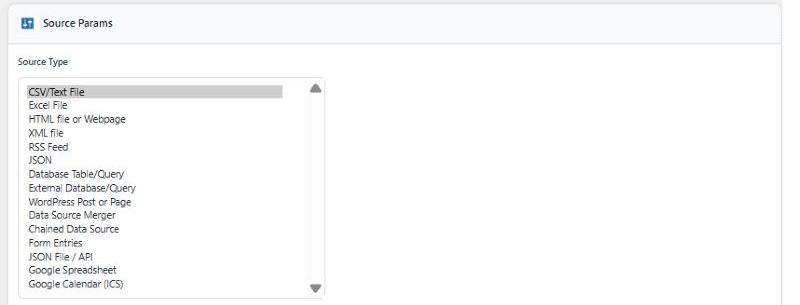
| Source Type | When it suits you |
|---|---|
| CSV/Text File, Excel File | You keep the events in a spreadsheet. Upload the file and replace it whenever it changes. |
| Google Spreadsheet | Several people keep the events up to date. Link a published Google Sheet and the calendar follows their changes by itself. |
| Google Calendar (ICS) | The events already live in Google Calendar, Outlook or any calendar that publishes an ICS address. |
| Database Table/Query, External Database/Query | The events are in a database, kept by another plugin or another system. |
| JSON, JSON File / API, XML file, RSS Feed | Another service publishes the events: a booking system, a ticket shop, a news feed. |
| Form Entries | Visitors submit events through a form on your site. |
| HTML file or Webpage, WordPress Post or Page | The events are in a table on a page. |
| Data Source Merger, Chained Data Source | You want to combine several sources in one calendar, or prepare the data in one ruleset before the calendar draws it. |
Choose your calendar ruleset in Ruleset Archive and Ruleset Name on the same form, save, and place the new data source with Existing Calendar / Timeline exactly as in part 2. If your source names its columns differently, the data source can rename them, so there is no need to change the source itself.
Common questions
The import says Safe Mode is enabled.
Import again with YES, overwrite safemode settings ticked. You can also turn Safe Mode off for good under EventBlender › User Preferences, but the tick is the safer habit.
I cannot find the EventBlender blocks.
The plugin is not active. Activate it under Plugins.
The calendar opens on the wrong month.
By default it opens on the month of the first upcoming event. In step 2 of the online wizard, Open on can choose today's date or a fixed date instead.
An event does not appear.
Check that its date is written as YYYY-MM-DD and its times as HH:MM, and that the first line of the data names the columns.
I changed the CSV but the calendar did not change.
The data source has caching on, or a page-caching plugin keeps the old page. Press Clear Cache on the Data Sources page and clear your caching plugin's cache too.
Can I show the same events in two layouts?
Yes. Create a second data source with the same source and another ruleset - say a timeline on the home page and the full calendar on an events page.
Read more
See all twelve layouts working on the Calendars & Timelines demo. More about the data: The CSV/Text File Data Source, The Excel File Data Source, The Database Table/Query Data Source and The Google Spreadsheet Data Source.
Make yours
Open the Calendar & Timeline Wizard, paste a few of your own events and follow the same steps.
Open the Calendar & Timeline Wizard